

close
Choose Your Site
Global
Social Media
Views: 0 Author: Site Editor Publish Time: 2026-07-30 Origin: Site


Specifying a high-quality Check Valve is only half the battle in fluid control. Improper installation geometry easily negates premium design benefits. This oversight leads directly to accelerated wear, destructive water hammer, or catastrophic backflow. Process stability requires a strategic alignment of system geometry, flow dynamics, and strict vendor guidelines.
Decision-makers must prioritize these elements to protect capital equipment and maintain safety compliance across operations. Suboptimal placement puts entire pipelines at risk of unplanned shutdowns. Reliable process performance relies on strict adherence to fluid dynamics principles rather than assumed drop-in replacements. We will explore how to match mechanical designs to actual line conditions. You will learn to navigate turbulence zones, orientation limits, and pre-installation verifications to maximize process efficiency.
Flow stabilization is non-negotiable: Installing check valves without adequate straight pipe runs (typically 5 to 10 pipe diameters) induces turbulence and premature internal wear.
Orientation dictates functionality: Not all valves function in vertical piping; gravity and flow direction must strictly align with the valve’s mechanical design (e.g., spring-assisted vs. swing).
Sizing must align with flow, not just pipe size: Oversized valves flutter and fail; selecting based on actual flow conditions and required cracking pressure is critical for process stability.
Vendor verification reduces risk: Shortlist suppliers who provide verifiable testing data, transparent warranty conditions tied to installation parameters, and clear orientation schematics.
Improper installation directly threatens process uptime and safety compliance. Facility managers often treat piping components as simple commodities. They assume any inline device will function flawlessly as long as flanges connect properly. This assumption creates a dangerous risk baseline. When you ignore fluid dynamics during installation, you actively invite mechanical failure. A poorly installed component transforms from a protective device into a point of critical vulnerability. It jeopardizes downstream equipment and endangers facility personnel through potential containment breaches.
Incorrect placement drastically increases the risk of water hammer. This phenomenon occurs when fluid momentum changes abruptly. Surges send shockwaves through the piping architecture. If you place a unit too close to elbows, tees, or centrifugal pumps, you exacerbate these surge events. The turbulent flow forces the internal disc to slam shut aggressively upon pump deactivation. This repetitive slamming compromises pipe joints. It threatens the structural integrity of expensive downstream equipment like heat exchangers and filtration skids.
Valve flutter, commonly known as chatter, carries a heavy financial impact. Chatter happens when internal components bounce rapidly against the seat. Turbulent flow zones or insufficient flow velocities usually cause this bouncing. The constant metal-on-metal impact destroys hinges, pins, and sealing surfaces. Facilities experience frequent maintenance intervals to replace shattered internals. This unplanned downtime halts production schedules. Operational budgets suffer drastically when maintenance teams must repeatedly address failures caused entirely by incorrect initial placement.
Misaligned components introduce hidden costs through systemic inefficiency. An inappropriately selected device creates excessive pressure drops across the line. Pumps must work harder to overcome this artificial resistance. They consume significantly more energy to maintain target flow rates. Over months and years, this increased electrical demand drains facility resources. System architecture relies on smooth, predictable pressure gradients. When you disrupt these gradients through poor installation logic, the entire process runs inefficiently.
Proper evaluation before breaking ground prevents catastrophic operational failures. Engineering teams must evaluate actual system conditions rather than relying on historical purchasing habits. Matching mechanical dynamics to piping geometry demands a rigorous review of fluid behavior, energy thresholds, and material science.
A persistent industry myth suggests matching the valve to the line size automatically guarantees success. This practice routinely causes catastrophic failures. You must size components based on the Flow Coefficient (Cv) and specific media density. The internal disc must open fully and rest stably against its stop during normal operation. If you install an oversized Check Valve in a low-flow line, the disc will hover in the flow stream. It will chatter continuously until mechanical failure occurs. Sizing for actual flow ensures the disc achieves full lift, stabilizing the process.
Evaluation Metric | Line-Size Matching (Common Mistake) | Actual Flow Sizing (Best Practice) |
|---|---|---|
Disc Position | Partially open, hovering in flow | Fully open, resting securely against stop |
Wear Profile | Rapid hinge wear, severe chatter | Minimal wear, stable operation |
Pressure Drop | Unpredictable, highly variable | Calculated, optimized for efficiency |
Lifespan | Significantly reduced (months) | Maximized (years to decades) |
Cracking pressure defines the minimum upstream pressure required to unseat the disc and initiate flow. Evaluating this metric determines overall system energy expenditure. High cracking pressures require pumps to exert more initial force. This delays flow initiation and consumes excess energy. Conversely, a cracking pressure that is too low might allow micro-leakage or fail to provide adequate resistance against minor back-pressures. You must match the cracking pressure exactly to the specific pumping capabilities and the vertical head pressure of the piping network.
Fluid characteristics dictate both material selection and physical installation methods. Slurries contain abrasive particulate matter. Corrosive fluids degrade standard elastomers. High-temperature gases warp incompatible metals. You must evaluate how the media interacts with internal geometries. For abrasive slurries, you might require specialized coatings and specific flange types to facilitate rapid replacement. Future maintenance access drives installation choices. Welded connections suit high-pressure, clean gas lines perfectly. However, flanged or threaded connections remain essential for systems handling aggressive media, allowing technicians to swap units quickly without cutting pipe.
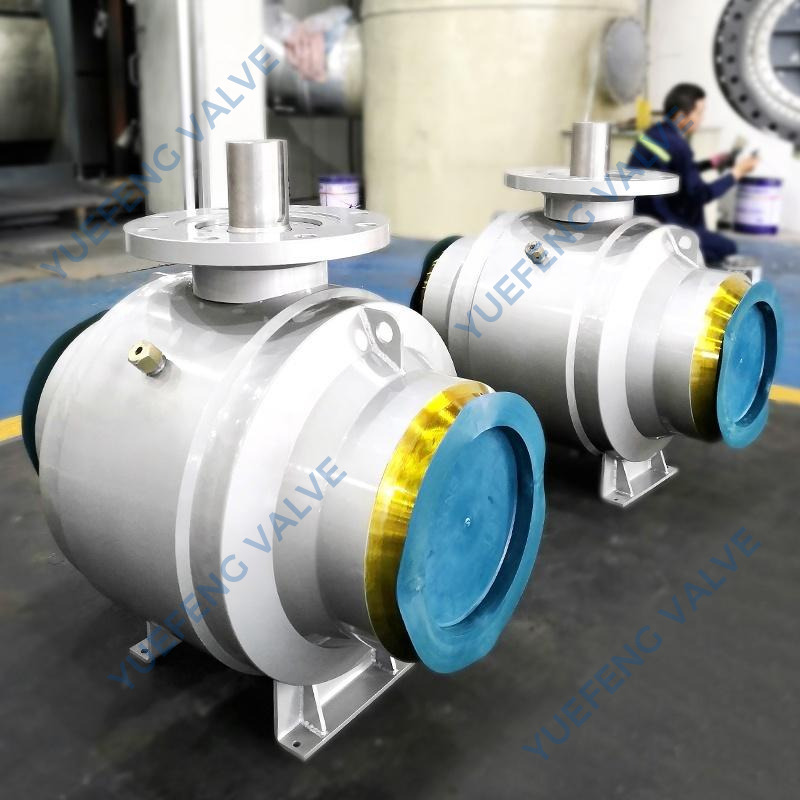
Physical placement within the piping network determines the lifecycle of the component. Fluid dynamics require stable conditions to interact safely with mechanical closures. Implementing strict geometric rules prevents turbulence-induced destruction.
Industry standards mandate specific straight pipe distances upstream and downstream. This rule is universally critical. You must avoid placing units directly after centrifugal pumps, sharp elbows, or throttling control valves. These fittings create violent, swirling flow patterns. To counteract this, installers must provide a straight run of pipe.
Measure Upstream Distance: Ensure at least 5 to 10 pipe diameters of straight, unobstructed piping before the inlet.
Measure Downstream Distance: Provide an additional 3 to 5 pipe diameters of straight piping after the outlet.
Verify Pump Discharges: Never bolt the unit directly to a pump discharge flange. Insert a spool piece to absorb initial kinetic turbulence.
Check Modulating Devices: Keep placement far away from modulating control elements to avoid pressure fluctuations.
Velocity profiles directly affect internal mechanisms. When fluid passes through an elbow or a reducer, the velocity profile skews. The flow moves faster on one side of the pipe than the other. If a Check Valve sits in this skewed zone, the uneven force pushes the disc off-center. This asymmetrical loading grinds the hinge pin into its bracket. Installing within laminar flow regions prevents this asymmetrical wear. Laminar flow applies uniform pressure across the entire surface of the disc, ensuring smooth, linear operation and extending component life significantly.
Lifecyle maintenance requires foresight during the design phase. Tight pipe racks often tempt engineers to bury components in inaccessible corners. You must plan for future human intervention. Installations must provide adequate clearance for technicians wielding large wrenches or automated torque tools. Inline servicing capabilities save thousands of dollars during turnarounds. Ensure the surrounding architecture allows technicians to remove cover plates and extract internals safely. Total unit replacement should never require dismantling entire pipeline sections. Build strategic spool pieces and isolation points into the initial layout.
Gravity acts as a constant, invisible force on all mechanical systems. Ignoring gravitational pull during installation leads directly to catastrophic backflow. Orientation dictates whether a specific design can function at all.
Physical limitations govern different mechanical designs. You cannot universally swap types across different orientations. Swing designs perform reliably in horizontal lines where gravity assists in pulling the heavy disc down onto the seat. Dual-plate designs often incorporate springs, making them more versatile. Lift designs require precise vertical alignment of the internal piston to avoid binding. When piping runs vertically, the options narrow drastically. Vertical upward flow requires mechanisms that can fight gravity to open, but use gravity to seal tightly. Vertical downward flow presents extreme challenges, as gravity actively pulls the disc away from the sealing surface.
Design Type | Horizontal Flow | Vertical Upward Flow | Vertical Downward Flow |
|---|---|---|---|
Standard Swing | Excellent | Acceptable (subject to velocity) | Strictly Prohibited |
Spring-Assisted Dual Plate | Excellent | Excellent | Possible (requires strong spring) |
Lift / Piston | Acceptable (must be upright) | Excellent | Strictly Prohibited |
Relying on flow alone creates massive vulnerabilities in non-horizontal lines. You must consider the weight of the closure mechanism. In a vertical upward installation, the fluid must push the heavy disc upward against gravity. If the flow drops slightly, gravity forces the disc down prematurely, causing flutter. Conversely, if you rely entirely on gravity to close a mechanism without spring assistance, a rapid flow reversal might outpace the mechanical closure. This delay allows dangerous volumes of media to surge backward through the system before the seal engages. Always factor the mass of the internals into your flow calculations.
Visual verification remains a basic but frequently violated rule. Manufacturers cast or engrave prominent flow arrows onto the exterior body. Technicians rushing through a shutdown occasionally install units backward. Torqueing bolts or welding a backward unit into a rigid pipe spool creates an immediate operational crisis. Upon startup, the backward mechanism acts as an impenetrable wall. Pumps dead-head, pressure spikes instantly, and seals blow out. Always implement a two-person verification process. Cross-reference the cast flow arrow against actual system flow diagrams before securing the first flange bolt.
Procurement teams must look beyond unit price. The true value of a supplier lies in their technical support infrastructure. Evaluating vendors based on their engineering resources ensures you receive components designed for real-world integration.
Depth of technical resources separates premium manufacturers from commodity brokers. Evaluate vendors by requesting specific installation Standard Operating Procedures (SOPs). Do they provide exact torque specifications for flange bolts? Do they clearly document orientation limits for their specific designs? A reliable supplier hands you comprehensive manuals detailing exactly how their product interacts with various piping geometries. If a vendor cannot produce detailed documentation regarding upstream straight-run requirements, they likely lack the engineering rigor necessary to support critical industrial processes.
Look for suppliers who explicitly connect their performance guarantees to installation geometries. Vague warranties often hide clauses that void coverage if you place the unit near a pump. Transparent vendors state exactly what parameters maintain the warranty. Furthermore, verify industry certifications. Ensure the manufacturer complies with API (American Petroleum Institute), ASME (American Society of Mechanical Engineers), or AWWA (American Water Works Association) standards. These certifications prove the design has undergone rigorous, standardized testing. A vendor who transparently aligns their warranty with ASME installation guidelines demonstrates high authoritativeness and trustworthiness.
Prioritize partners who do not disappear after delivery. Excellent vendors offer clear testing protocols to verify operational integrity immediately following installation. They provide guidelines for hydro-testing the line safely without damaging internal seals. They offer criteria for verifying seat tightness under initial pressure. Some advanced manufacturers even assist in vibration analysis during the initial pump startup to confirm the disc rests stably. This post-installation validation ensures the system enters production safely, mitigating the risk of startup failures.
Maximizing process performance requires treating fluid control installation as a precision engineering task. It is never a basic pipefitting chore. Ignoring straight-run requirements or gravity limitations guarantees mechanical failure and process instability.
Evaluate actual flow conditions (Cv) rather than relying blindly on line size to prevent continuous chatter.
Enforce strict straight-run piping rules upstream and downstream to isolate internal components from destructive turbulence.
Visually verify orientation limitations and flow arrows before finalizing any welded or flanged connection.
Demand comprehensive installation SOPs and transparent warranty conditions from your chosen manufacturing partners.
We mandate that procurement and engineering teams align completely on technical specifications and physical environments before finalizing a vendor shortlist. Do not leave placement decisions entirely to field contractors. Encourage your engineers to consult with technical sales teams today. Audit your specific piping schematics together to ensure optimal selection and secure the long-term reliability of your infrastructure.
A: No. Only specific designs function reliably in vertical piping. Spring-assisted types usually perform best. Flow direction strictly limits your options; vertical upward flow accommodates certain lift or swing designs, but vertical downward flow prohibits most gravity-dependent models entirely.
A: Installing directly post-pump exposes the internals to highly turbulent flow. This kinetic instability causes violent disc flutter. The constant bouncing creates rapid hinge pin wear, leading to eventual and often catastrophic mechanical failure of the unit.
A: If the internal disc does not fully open and rest securely against its stop during normal operational flow rates, it is oversized. The resulting hovering causes continuous chatter. Always base sizing on exact flow calculations, never just existing pipe diameter.
A: Yes. In vertical installations, the physical weight of the internal components interacts with the flow. Gravity can either add to or subtract from the manufacturer’s stated cracking pressure, requiring careful hydraulic calculation during the initial evaluation phase.


